CARD SPEND · LAPTOP SETUP
Connect your bank alerts
About 3 minutes in Gmail on this laptop. Only bank emails are forwarded, never the rest of your inbox. Each step ticks itself off below.
Your Card Spend address
1
Open the bank-only filter
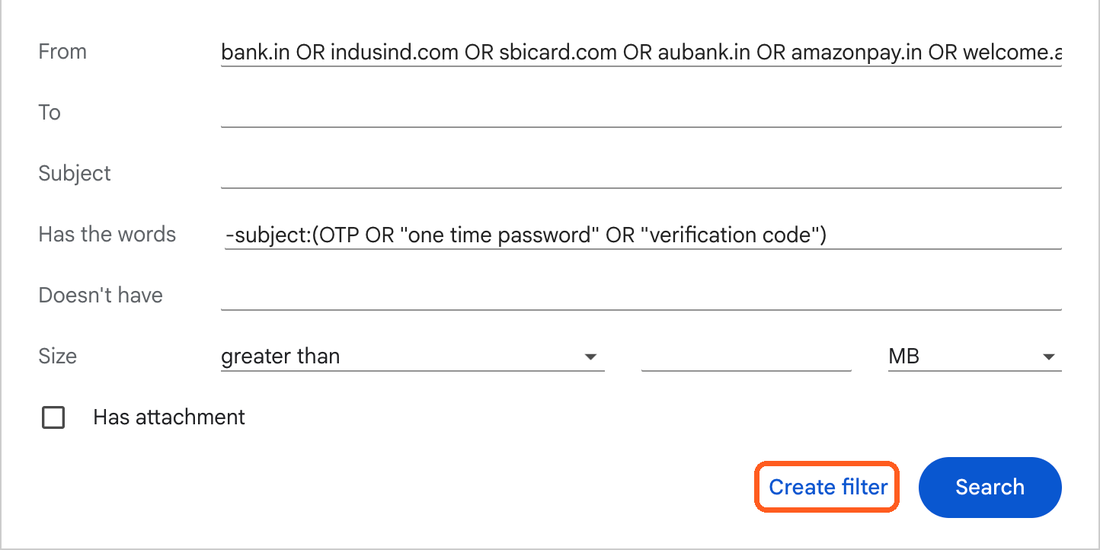
Open Gmail filterGmail opens with the bank senders already filled in. Click Create filter, not Search.
2
Add your Card Spend address
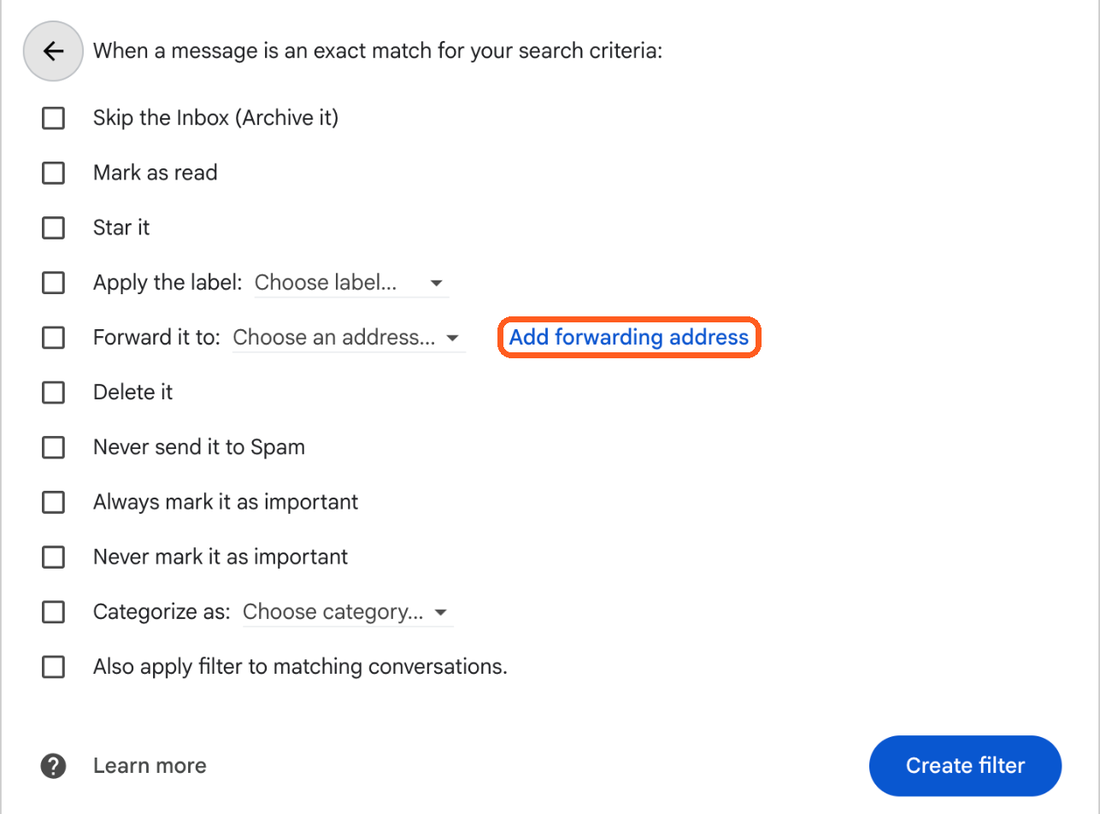
Click Add forwarding address.
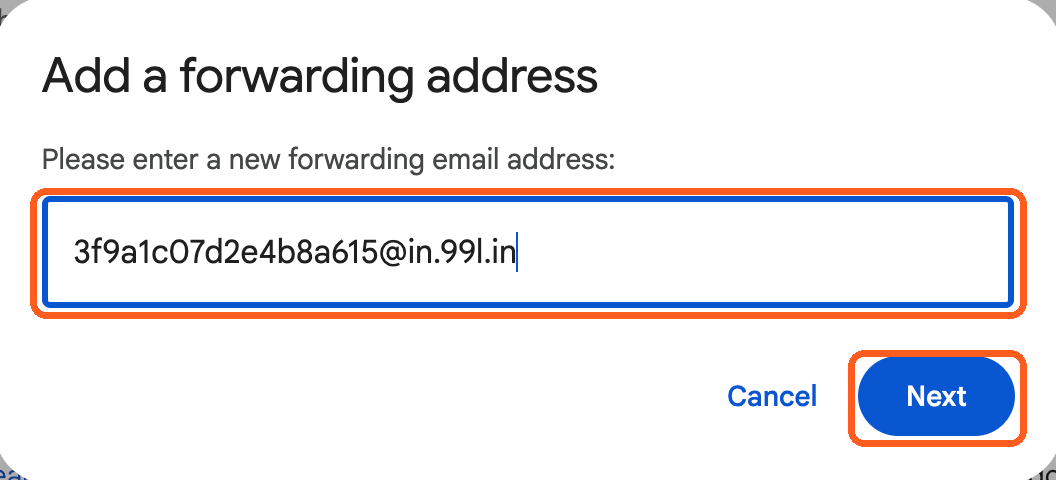
Paste your address (the Copy button at the top of this page) and click Next. Then click Proceed, then OK.
Google may ask you to sign in again. That's Google checking it's really you.
Gmail then shows its Forwarding settings. Leave Disable forwarding selected and don't change anything there. That setting forwards your whole inbox; the filter in step 4 forwards bank emails only.

Waiting for Gmail…
3
We confirm it for you
Gmail now asks Card Spend whether it may forward. We say yes on your behalf, within seconds. Nothing to do here.
This ticks off as soon as it's done.
4
Finish the filter
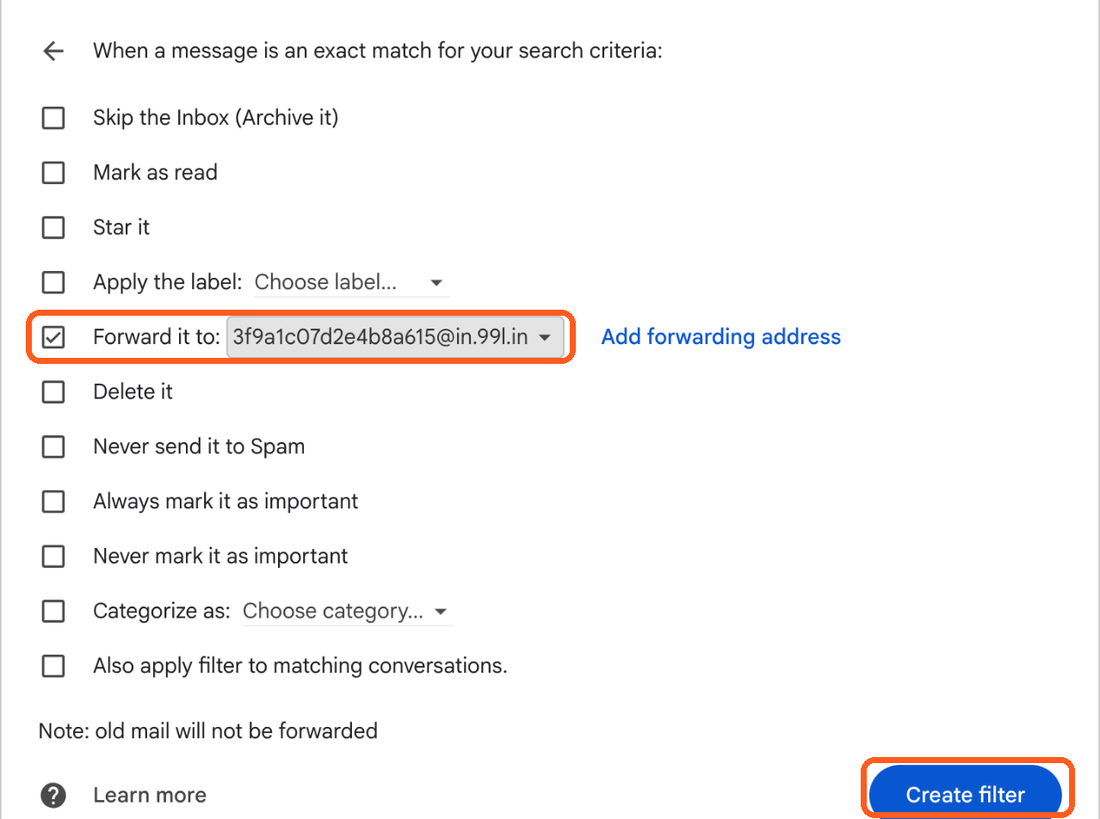
Open Gmail filter againClick Create filter. Tick Forward it to, pick your Card Spend address, then click Create filter.
This ticks off when the next bank email arrives. To check now, forward any recent card alert to your address.
Optional: bring in past spends
Forwarding only catches new emails. To see everything since :
Show the steps
- Gmail ⚙ Settings → See all settings: set Maximum page size to 100 and turn Conversation view off → Save changes.
- Open the search for your past bank alerts.
- Tick the select-all box → ⋮ More → Forward as attachment → send to your Card Spend address.
- Go to the next page (›) and repeat until the end.